
![]()
![]()
You
may have noticed more and more exotic-looking green tea desserts showing
up in restaurants,
magazines
and social
media. Even though matcha is currently a hot trend in food &
beverage, what you don't see, unfortunately, is a lot of recipes for all
those beautiful desserts. As a result, cooking
with matcha may seem like a difficult challenge, but the good news is
that it's really much simpler than you might think, and, on this page,
we're going to explain how you can make almost anything into a crowd-pleasing
green tea dessert.
.
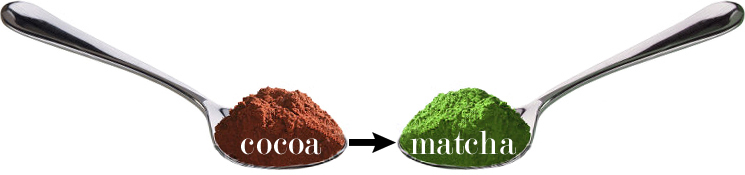
It's no secret that one of the most popular dessert flavors is
chocolate. This is a good thing because most from-scratch chocolate desserts
call for chocolate in powdered form - which is cocoa. This
makes it easy to convert almost any chocolate recipe to green tea simply
by substituting matcha (powdered green tea) for cocoa powder.
.Using
this method, you'll never see a chocolate recipe the same way again -
suddenly, you'll want to turn everything green: green tea ice cream, cookies,
cakes, doughnuts, cream-rolls, cupcakes, cream puffs, crêpes, waffles,
madeleines, mousse, tiramisu... the possibilities with matcha are endless!
.
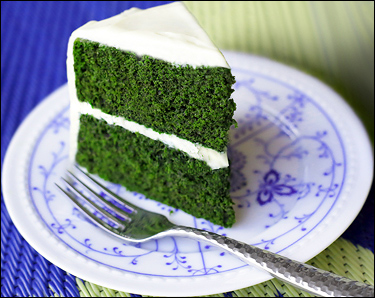
Below, we'll show you how we converted
a classic Devil's Food cake into a beautiful (and delicious) matcha layer
cake, but first, a few important notes:
.
CONVERSION:
Since matcha is a little
more intense (and a lot more expensive) than cocoa, we recommend using
a little less than the amount of cocoa indicated. For example, if the
recipe calls for ¾ cup of cocoa, try using ½ a cup of matcha.
.
A
NOTE ABOUT COCOA:
There are different kinds of cocoa powder: natural
cocoa and Dutch or alkalize cocoa. Cocoa is naturally
acidic, but Dutch-processed cocoa is alkalized to a neutral pH, giving
it a darker color and milder flavor. Being neutral, Dutch cocoa lacks
the acidity needed to create the chemical leavening action (in combination
with baking soda) required by some recipes. Since matcha is slightly alkaline,
it, like Dutch cocoa, will not provide the acid needed. Instead, you will
need to add some other acid ingredient, such as buttermilk, yogurt, lemon
(or other citrus) juice, vinegar, etc., or use baking powder
instead. Baking powder is baking soda (sodium bicarbonate) combined with
one or more acidic ingredients, so it includes its own acid.
.
ALSO
NOTE:
Since the chemical reaction created by using baking soda
or powder (the creation of carbon-dioxide gas for leavening) is brief,
add either or both to the recipe last, mix it in quickly and bake it right
away. (“Double-Acting” baking powder releases most of its gas
immediately
at room-temperature, but also produces more when heated.)
.
If you have any questions,
contact
us, and share your recipes and photos!
Matcha
Layer Cake
(Prep:
30 min., Bake: 30-35 min., Oven: 350°F)
Ingredients:
2 cups flour
1¾ cups sugar
1½ cups buttermilk*
1½ cups (1½ sticks, 12 tbsp) butter (softened)
½ cup matcha
1 tsp baking powder
1 tsp baking soda
1 tsp salt
2 tsp vanilla extract
4 eggs
*Make
your own buttermilk by adding 2 tbsp of lemon juice (about half a lemon)
to regular non-, low- or full-fat milk and letting it sit for 5-10 minutes
to thicken.
Alternatively,
to make
without buttermilk, use 1½ cups of regular milk and 2 tsp baking
powder (omitting the baking soda).
The result will be a slightly less light & fluffy cake.
Directions:
Preheat oven to 350F.
Grease and flour three 8" or two 9" round cake pans, or one
9" x 13" pan.
If making your own buttermilk, in a bowl or a glass, stir lemon juice
into milk and let sit to thicken. (Don't worry about it getting lumpy.)
In a large mixing bowl, combine butter, sugar and salt, and beat until
light and fluffy. [photo]
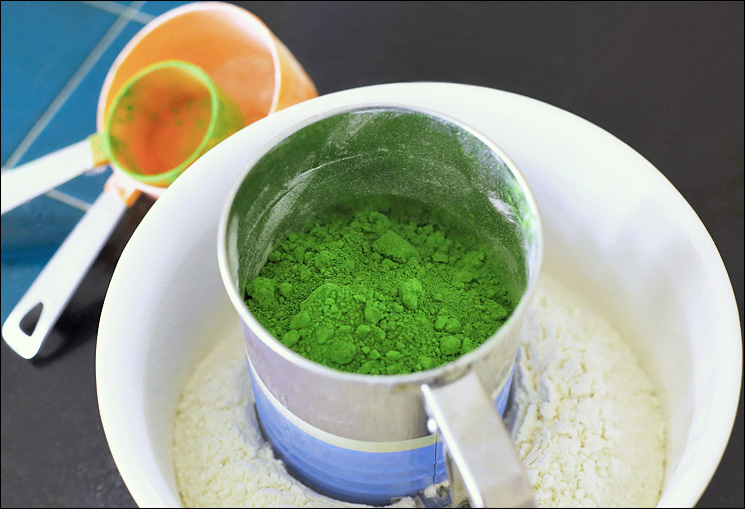
In another bowl, sift flour, matcha, baking soda and baking soda, then
whisk to combine. [photo]
To the butter/sugar mixture, add one egg at a time, beating well after
each one.
Stir the vanilla extract into the (butter) milk
Add about a third of the flour mixture to the batter,
then half the milk and stir. Next, add another third of the flour and
the rest of the milk, and stir. Finally, add the rest of the flour and
stir thoroughly, but quickly since the leavening action it now in full
force, but won't last long.
Immediately divide the batter evenly between the floured pans. [photo]
Bake 30 to 35 minutes, until a toothpick inserted into the center comes
out clean. [photo]
Remove the cake(s) from the oven, cool them for 5 to 10 minutes, then
remove them from their pans (leave the 9" x 13" cake in the
pan, for easiest serving). [photo]
Cool completely before frosting.
We topped this cake off with sweet and tangy vanilla cream cheese frosting:
Cream Cheese Frosting
Ingredients:
8 ounces cream
cheese, room temperature
8 tablespoons (1 stick) unsalted butter (softened)
1 cup confectioner's sugar
1 teaspoon vanilla extract
Directions:
Place softened cream cheese and butter in a mixing bowl and beating
until blended and smooth. [photo]
Sift in confectioner's sugar, add vanilla and beat until smooth. [photo]

For more recipes, check the NEWS page and share your success stories with us.
![]()
. . . submitting . . .